Creating and managing test suites
Important
This section includes information that is only applicable to Skyline employees.
In this tutorial, you will learn how to create a QAOps test suite, add test packages to it from the DataMiner Catalog, and manage the packages (reorder, open, remove) with the QAOps Operator app.
Expected duration: 15 minutes.
Prerequisites
Operator access to the QAOps Operator app (the blue app).
The Catalog ID of at least one test package published in the DataMiner Catalog. To create your own test package, see Creating a test package.
Overview
Step 1: Explore the Test Suites page
In the QAOps Operator app, go to the Test Suites page using the navigation pane on the left.
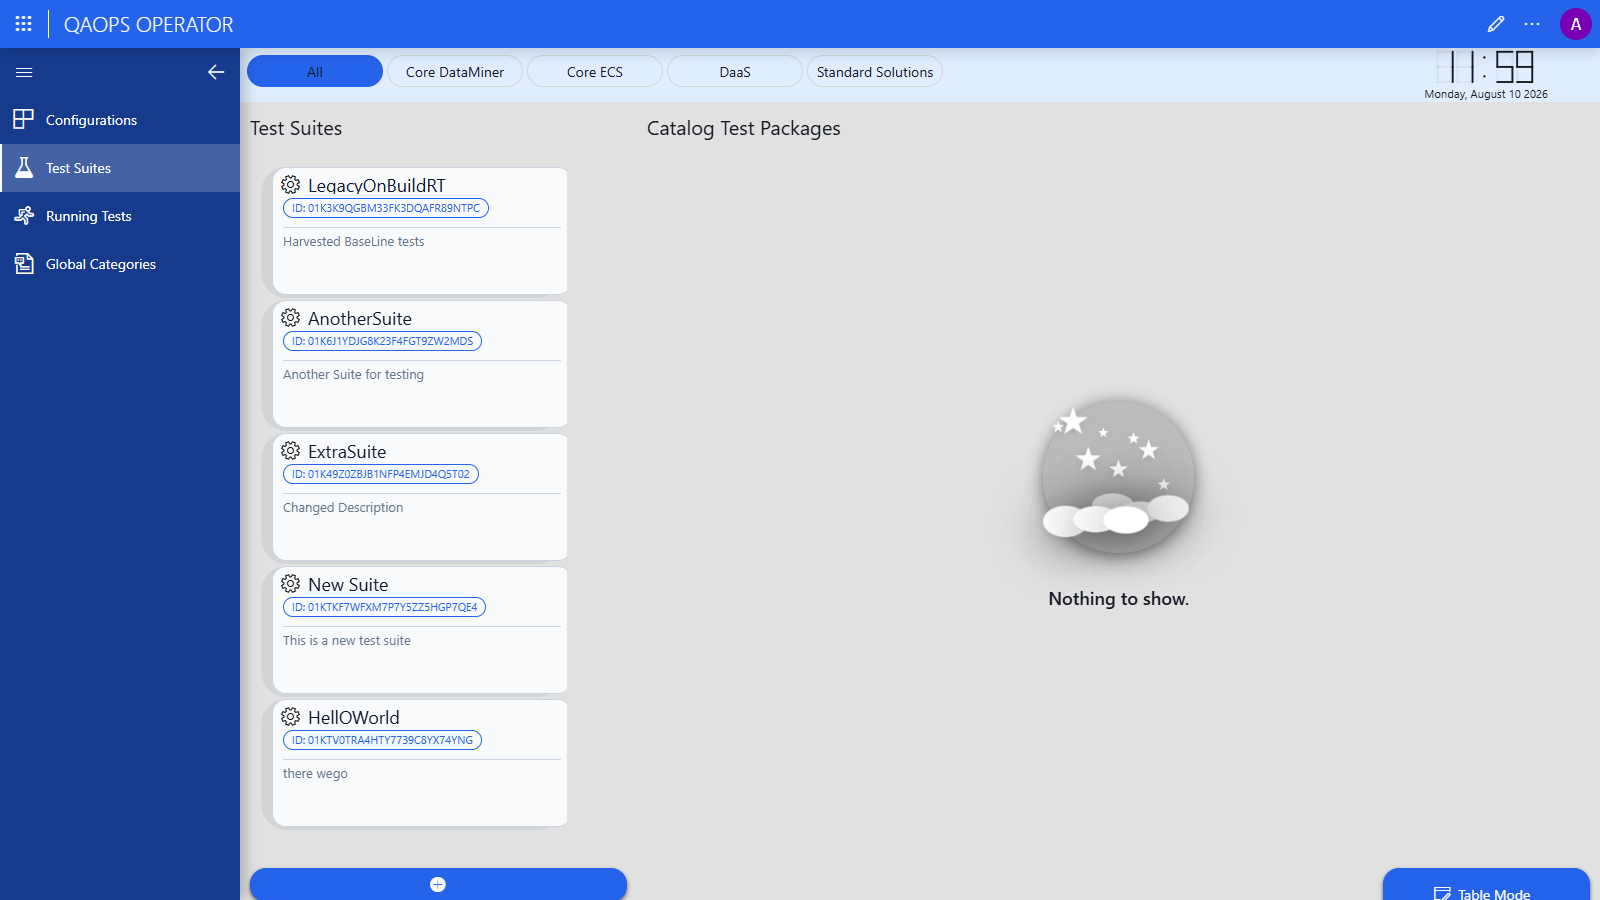
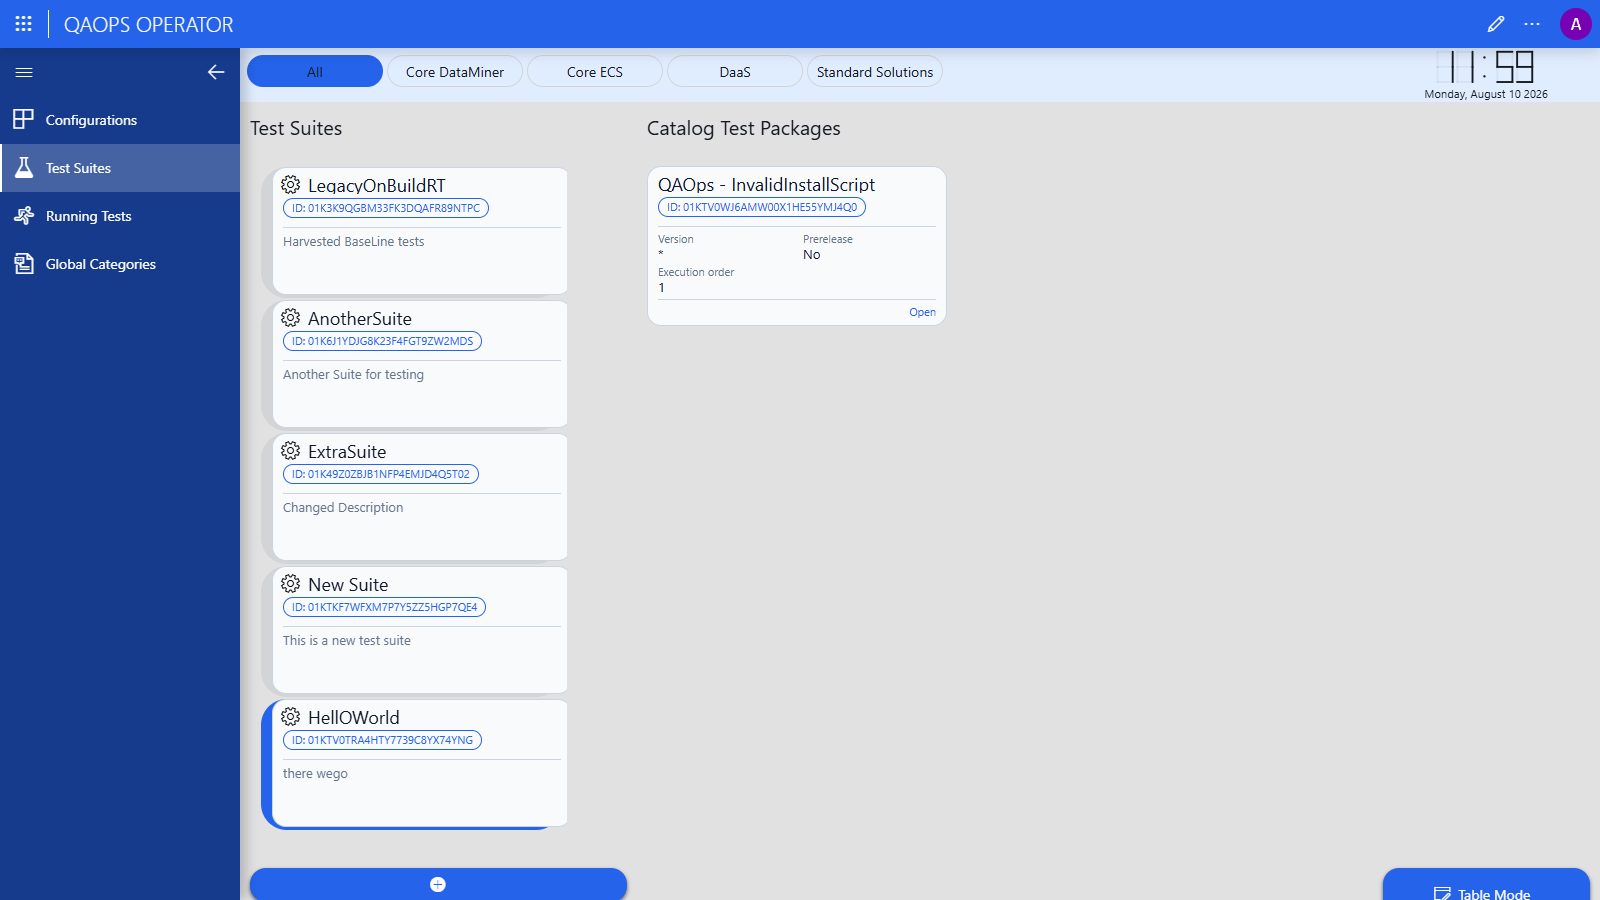
Select a test suite card.
The Catalog Test Packages panel on the right shows every test package in the suite. The number in the upper-right corner of each package card is its execution order. The Open button takes you to the package's Catalog page.
Step 2: Create a test suite
Scroll to the bottom of the test suite card list, and click the ⊕ button.
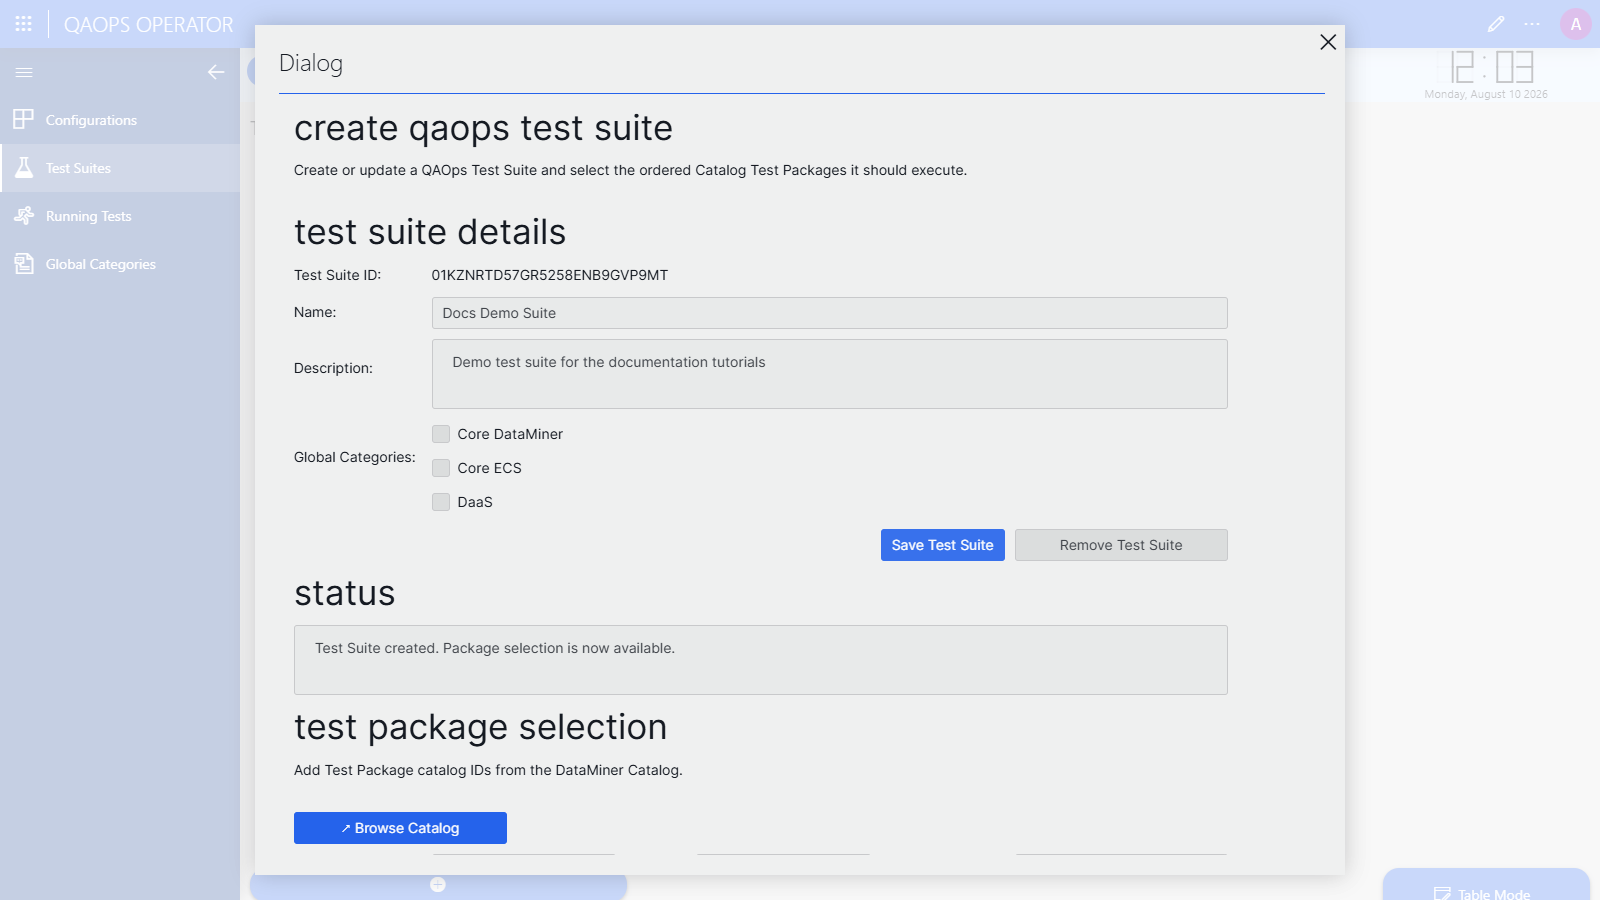
The Create QAOps Test Suite dialog will open with an automatically generated Test Suite ID (ULID).
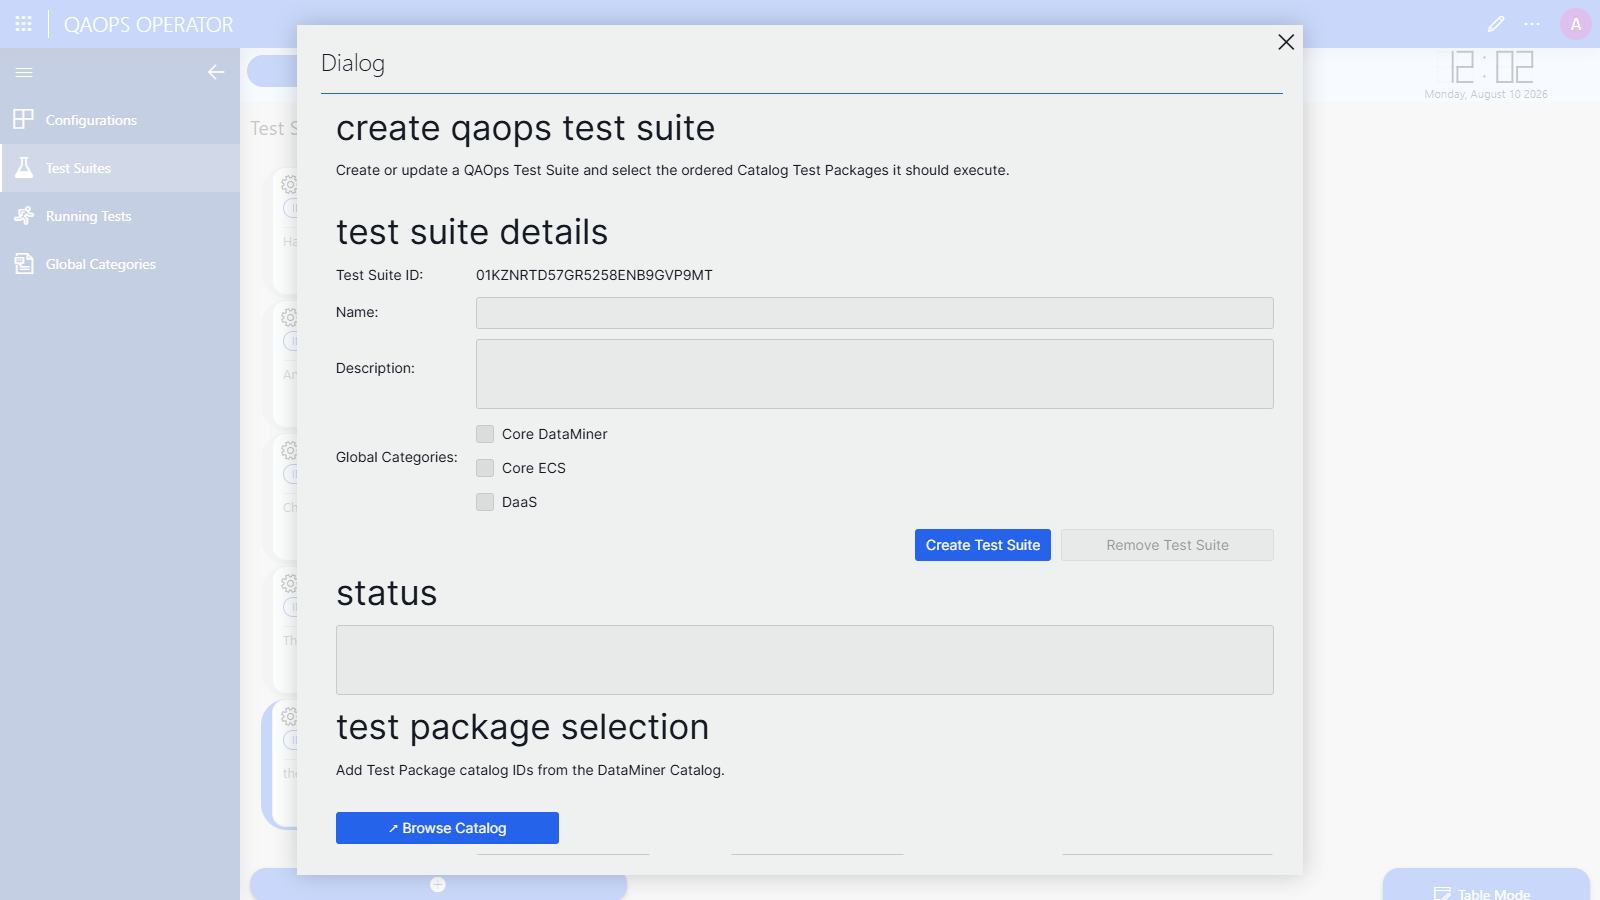
Enter a Name and a Description.
Optionally select one or more Global Categories to make the suite easier to find with the header bar filter buttons.
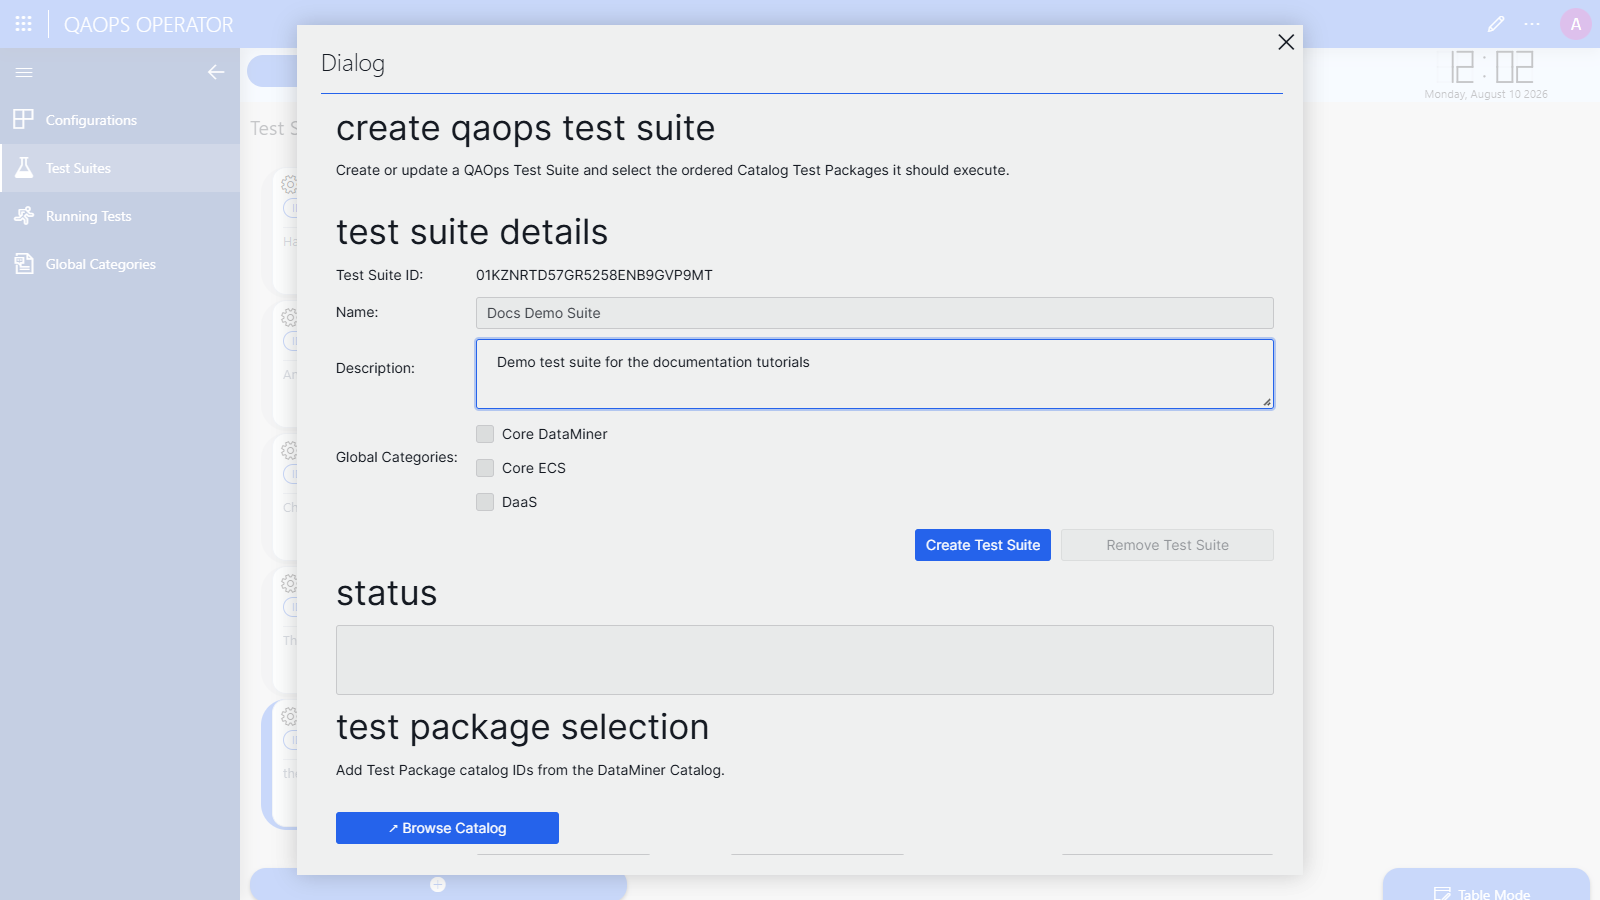
Click Create Test Suite.
The Status box will confirm with Test Suite created. Package selection is now available., and the button will change to Save Test Suite for further edits.
Step 3: Add a test package from the Catalog
After the suite is created, the Test Package Selection section will become available in the same dialog.
If you do not know the Catalog ID of your test package yet, click Browse Catalog.
This will open the DataMiner Catalog filtered on test packages in a new tab. Open your package there, and copy its Catalog ID (a GUID) from the page URL or details.
Paste the GUID in the Catalog ID box.
Keep Version set to
*to always use the latest stable version, or enter a version filter. The version filter accepts NuGet-style wildcards, e.g.,1.2.*; see version filters for test packages.Set Allow Prerelease to Yes if prerelease versions may be used.
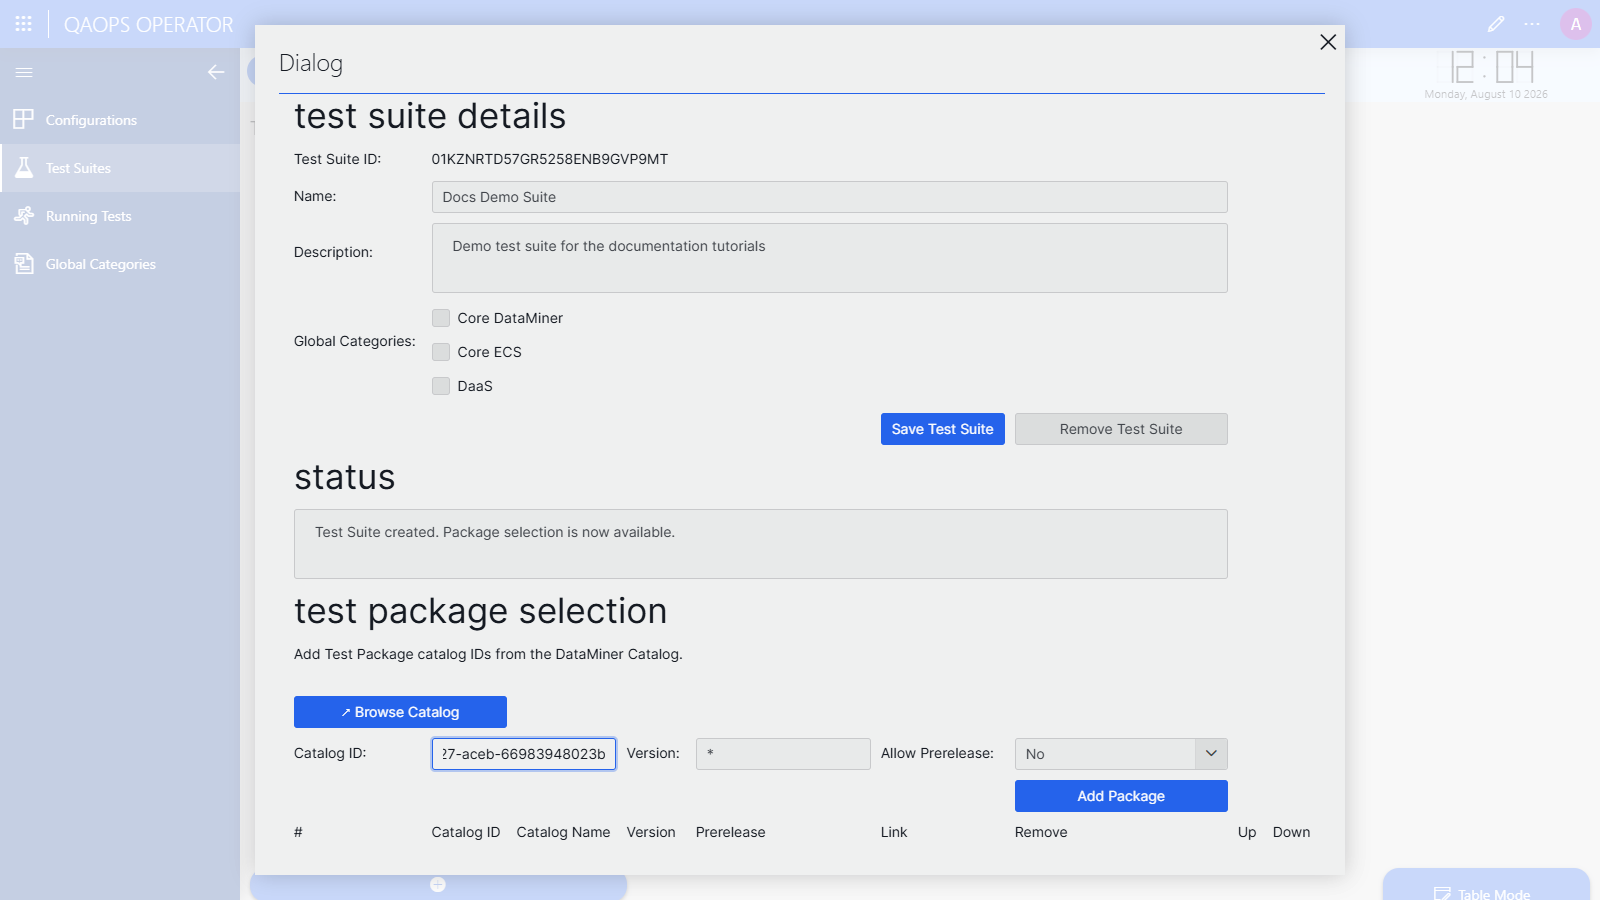
Click Add Package.
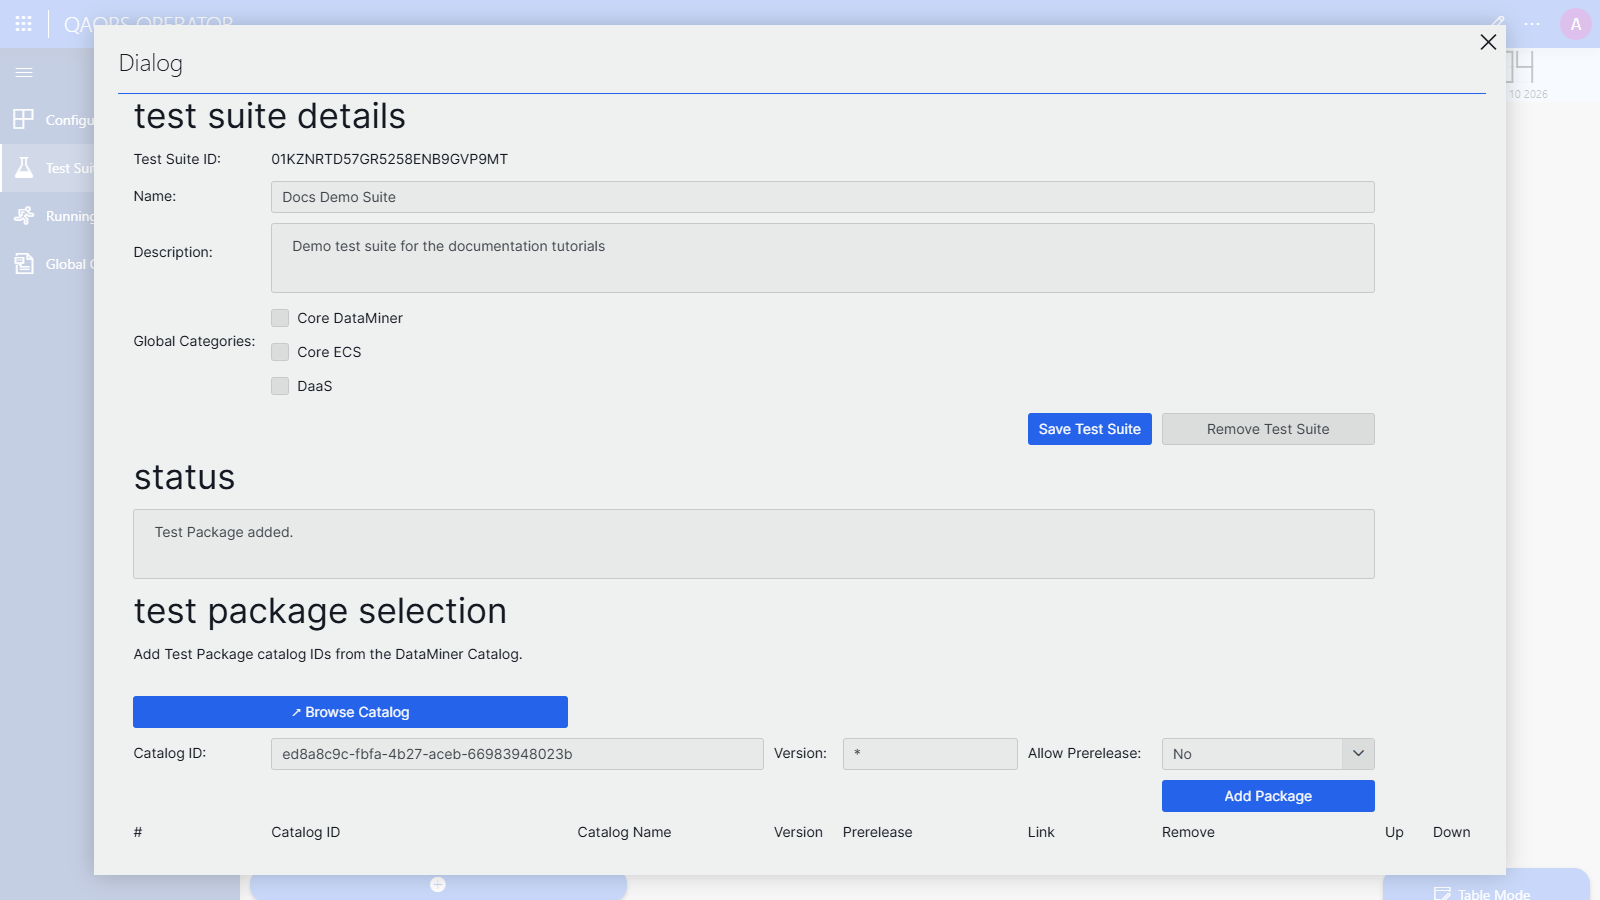
The Status box will confirm with Test Package added., and the package will appear in the table.
Step 4: Manage the packages in a test suite
You can manage packages of an existing suite at any time. On the Test Suites page, click the gear icon on the suite card to open the Edit QAOps Test Suite dialog.
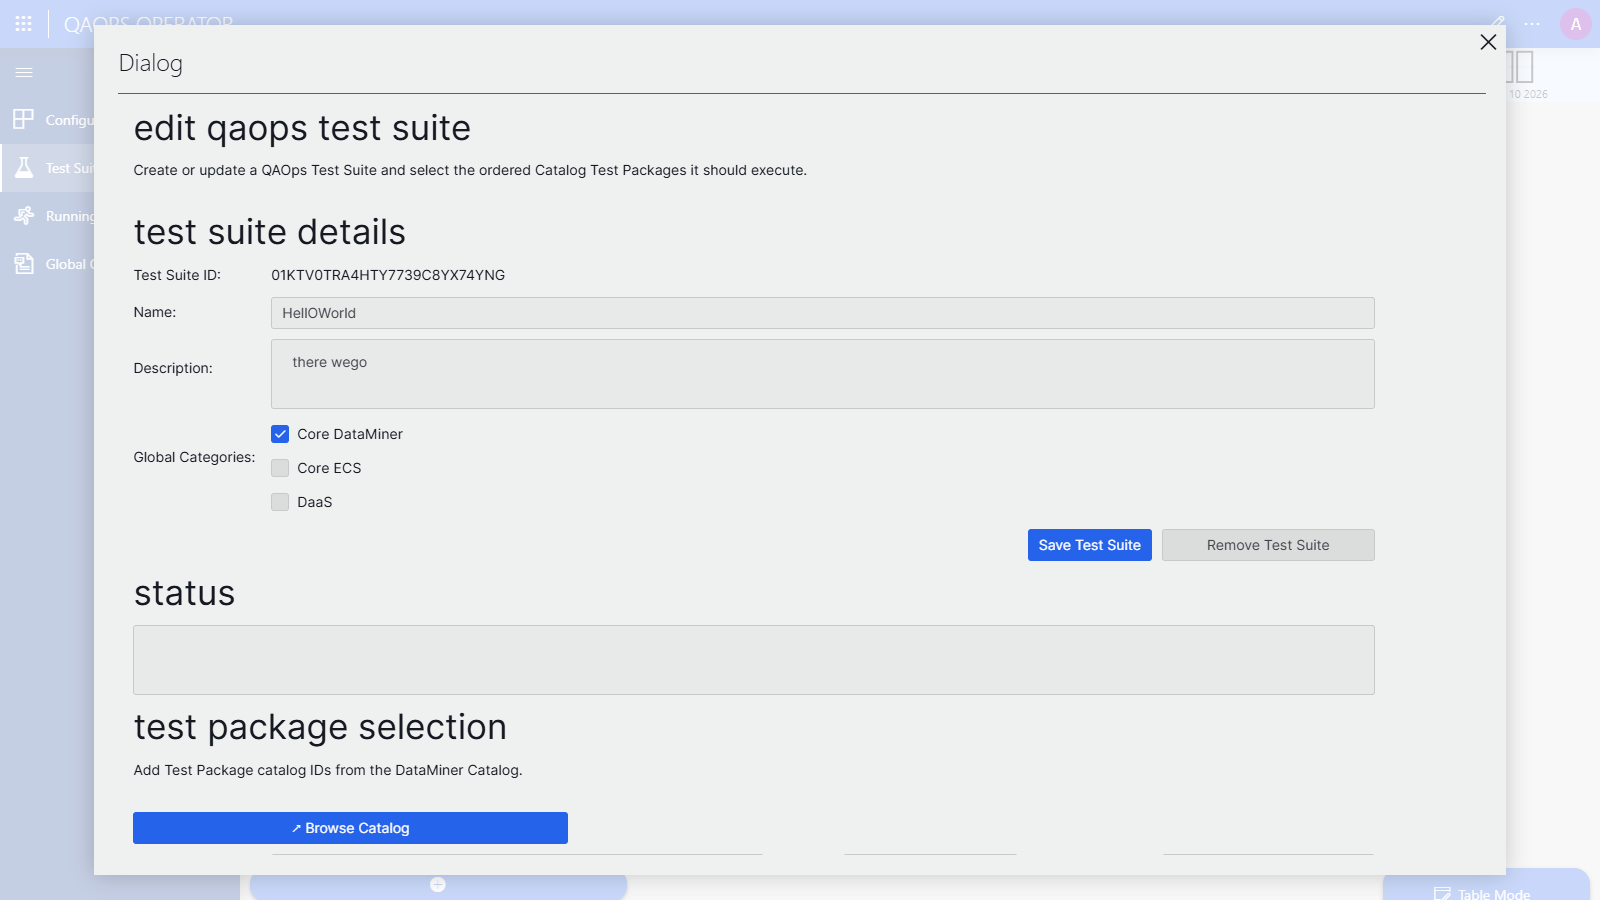
In the package table at the bottom of the dialog:
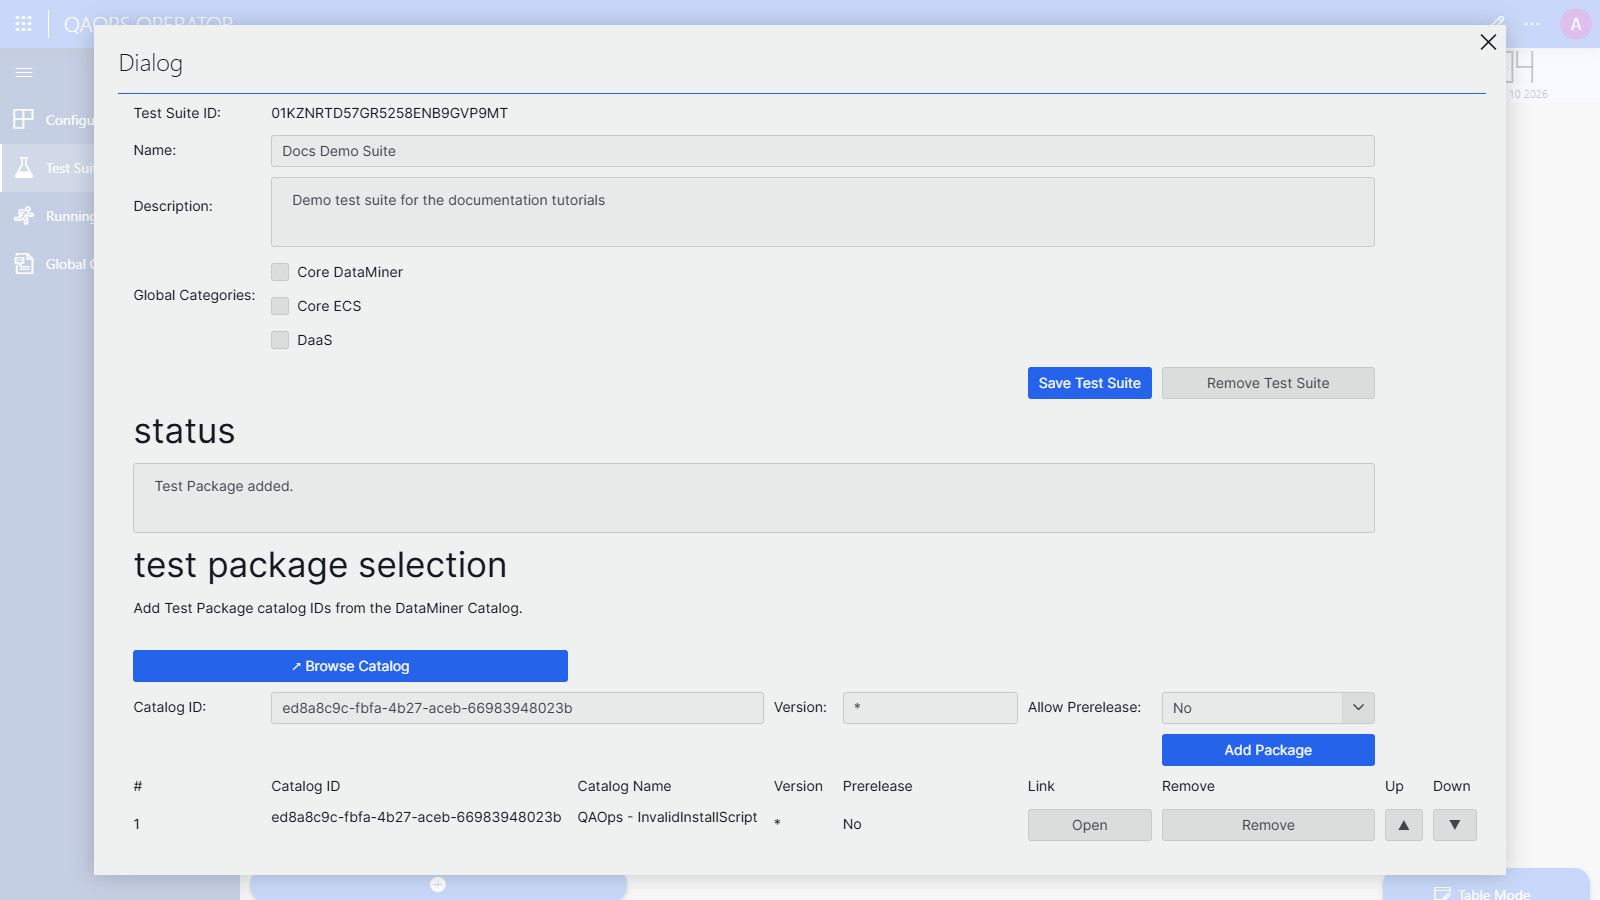
The # column will show the execution order in which packages will run when the suite is triggered.
Use the ▲ and ▼ buttons to move a package up or down in the execution order.
Click Open to go to the package's Catalog page.
Click Remove to remove the package from the suite.
When you are done, click Save Test Suite, and check the Status box for confirmation.
Important
Deleting an entire test suite is something only a QAOps Administrator is allowed to do. Click the Remove Test Suite button to request a removal. Be aware that removing a suite that is still allowed on a configuration will clear that configuration's test run history.
Step 5: Allow the test suite on a configuration
A test suite only runs on configurations that explicitly allow it:
Go to the Configurations page.
Click the gear icon on your configuration card.
Under Test Suites, select the checkbox of your new suite.
Click Save Configuration.
Important
Adding a test suite to an existing configuration is an impactful operation that you cannot undo yourself. If you are not sure, create a new configuration, and add the test suite there. See QAOps test suites.